
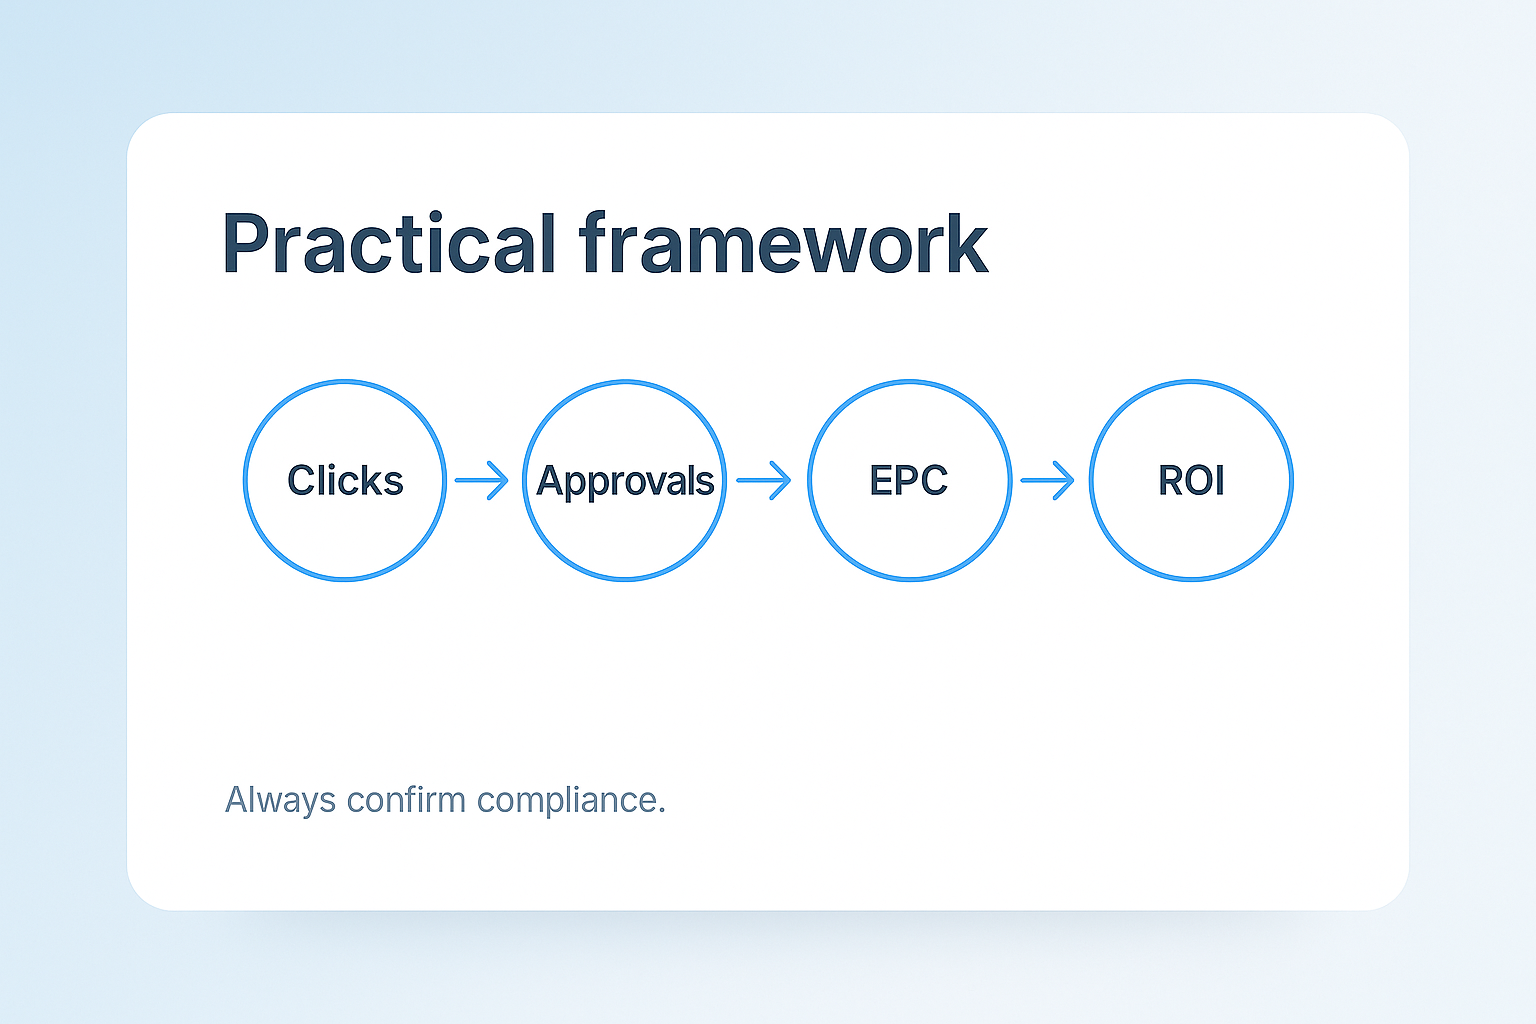
This Leadgid dashboard tutorial for loan affiliates shows the shortest safe path to clean numbers: pass UTMs + a unique click ID in every link, enable an S2S postback, and build cohort views (GEO / device / source / angle) so you can read Impr → CTR → pre-lander CR → submit → approval → EPC at a glance.
Key takeaways
- One source of truth: clean tokens/UTMs + verified postback = reliable EPC and approval math.
- Cohorts win: split results by GEO / device / source / angle and keep tests clean for 7–14 days.
- Approval loop: log approval reasons weekly and reflect them in eligibility copy and routing.
- API/Exports: automate snapshots to your BI; reconcile with payout files.
- Finance hygiene: confirm payout cadence, currencies, and cut-off dates before you scale.
Leadgid Dashboard Tutorial for Loan Affiliates
Before you dive into campaign setup, it’s crucial to establish a clean foundation - both technically and in terms of compliance. This dashboard tutorial for loan affiliates walks you through the essential pre-launch steps to ensure your tracking, permissions, and policy setup are flawless from day one. Here, you’ll prepare your campaigns for consistent reporting, reliable postback tracking, and full compliance with traffic and disclosure requirements. Getting these basics right prevents data loss, policy violations, and misattributed conversions later on - three of the most common pitfalls for new affiliates.
- Before You Start (Policy & Data Hygiene)
Think of this stage as your campaign’s quality gate. Every item here builds the foundation for smooth analytics and approval consistency once traffic starts flowing. - Policy check. Confirm all allowed-traffic types and disclosure requirements for your first offer. Save a screenshot or PDF of the terms so you can reference them if questions arise later.
- Name your cohorts. Define and label each campaign segment precisely: one GEO (geographic region), one source, and one angle per test. Use a clear short code - for example, ES_SEO_ELIG-A - to keep your dashboards and postbacks easy to read and filter.
- UTM plan. Decide in advance which tracking parameters you’ll pass. Include UTM fields (utm_source, utm_medium, utm_campaign, utm_content) and a unique click ID (for instance, cid) for accurate attribution across tools.
- Permissions. Make sure you have access to add a server-to-server (S2S) postback endpoint - and test it. Proper postback validation ensures that every approved lead is tracked correctly in both the Leadgid dashboard and your own analytics system.
Set up tracking & postbacks on Leadgid - Start now.
Tracking basics - tokens & UTMs
Pass the same fields everywhere (ads, pre-landers, internal links) so reports stitch together. The safest pattern for Leadgid tracking tokens for UTM parameters is:
Sample tracking URL (placeholder tokens):
https://offer.example.com/?utm_source={{utm_source}}
&utm_medium={{utm_medium}}
&utm_campaign={{utm_campaign}}
&utm_content={{utm_content}}
&cid={{click_id}}
Use consistent lowercase UTMs and avoid spaces. Keep a living sheet that maps campaign names ⇄ angles.
[pic] Tracking flow diagram (Click → UTM+ClickID → Postback → Report/EPC).
Token map (fill with your macro syntax)
|
Your field |
Purpose |
Example value |
Token / macro placeholder* |
|
utm_source |
Traffic platform |
seo / meta / reddit |
{{utm_source}} |
|
utm_medium |
Channel flavor |
organic / cpc / ugc |
{{utm_medium}} |
|
utm_campaign |
Cohort code |
ES_SEO_ELIG-A |
{{utm_campaign}} |
|
utm_content |
Angle/creative |
fees-explainer |
{{utm_content}} |
|
cid (click ID) |
Unique click stitching |
c_9f2a1... |
{{click_id}} |
*Replace with your actual platform/network token syntax. The intent here is a map, not credentials.
Postback setup (S2S)
The postback tells your system which clicks converted and with what status/payout. Configure it once, test it thoroughly, and archive the proof.
Basic flow
- Your link passes cid (click ID).
- The network stores cid with the click.
- On conversion, the network requests your postback URL, sending status, payout, and the same cid.
- Your endpoint logs it and marks the right click as approved/rejected.
Example postback endpoint (placeholder params):
https://your-tracker.example.com/postback?
cid={click_id}&status={status}&payout={amount}¤cy={cur}
Test checklist on How to set up postback in leadgid:
- Generate a test click and record its cid.
- Fire a test conversion from the network; confirm your logs show the right cid, status, and payout.
- Verify the event appears in your dashboard report for the same cohort.
- Save screenshots of the settings and the successful test.
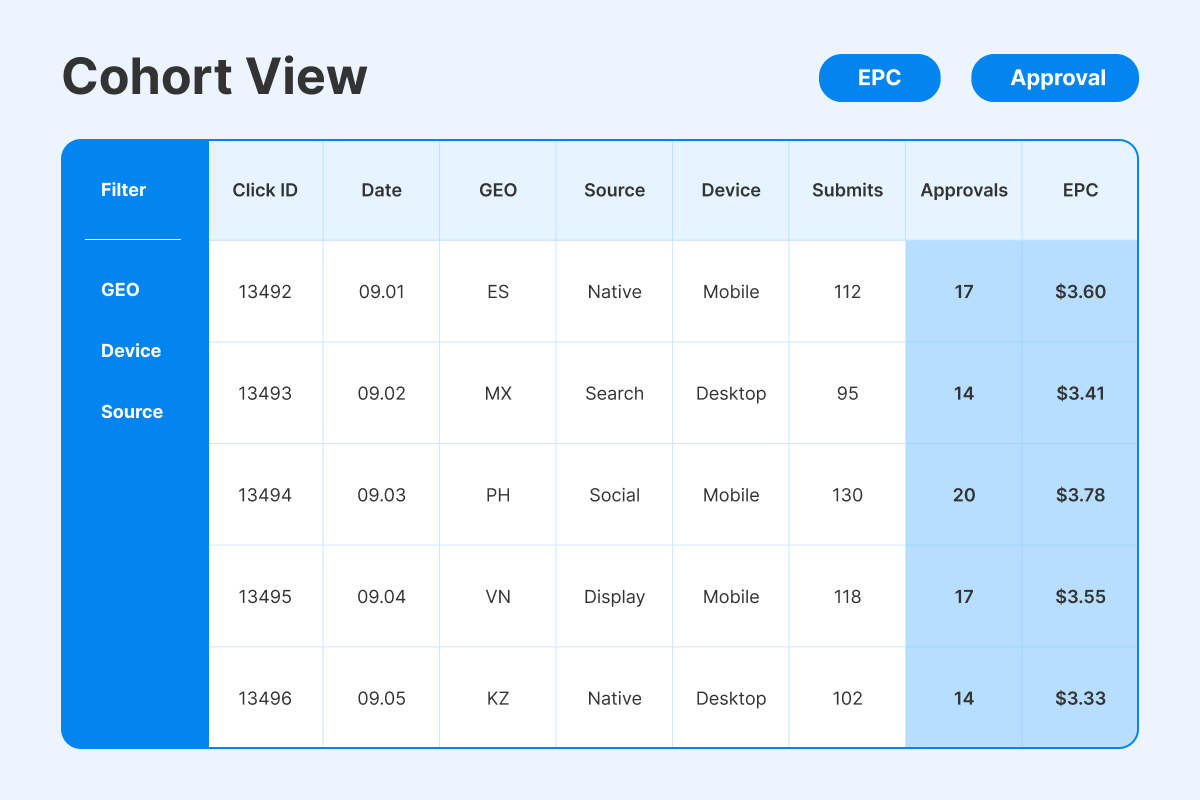
Building cohorts reporting for loan affiliates & reports
Cohorts make optimization obvious and disagreements rare.
Create a saved view with columns:
- GEO, device, source, angle (from your UTMs)
- Impressions, CTR, Pre-lander CR, Submit rate, Approval rate, EPC
- Conversion count and payout sum
Good habits
- One cohort = one test. Keep it clean for 7–14 days.
- Pin a Week-over-Week view; compare the same cohort across weeks.
- Annotate changes (“eligibility bullets v2”, “form input mask fix”).
[pic] Cohort report mock (GEO/device/source/angle with EPC & Approval columns).
Approval feedback loop
Your weekly ritual: read approval/denial reasons, adjust copy/UX, and track the result.
Where the signal comes from
- Dashboard fields and notes (if present), or
- Account manager summaries by offer/GEO
Turn feedback into edits
- If “income/age mismatch” → clarify eligibility bullets above the fold.
- If “fees misunderstood” → rephrase costs & timelines in plain language.
- If device friction → fix tap targets, input masks, and error hints.
|
Denial reason |
Change you make this week |
Where it lives |
|
“Low/unstable income” |
Add minimum income examples; move eligibility block to top |
Pre-lander hero |
|
“Fees unclear” |
Bullet repayment cadence & late-fee risk |
Costs/timelines block |
|
“Abandoned on mobile” |
Compress images; improve errors |
Form & assets |
API & exports (optional, for ops teams)
If you automate reports, pull daily snapshots into your BI, keyed by utm_* and cid.
What to plan for the Leadgid API reporting guide
- Auth method and endpoints, date/time filters, pagination, rate limits
- Dimensions (GEO/device/source/angle) and metrics (clicks, submits, approvals, payout)
- Daily CSV exports as a fallback
Payout cadence & finance hygiene
Clean analytics means little if finance can’t reconcile it.
- Confirm cadence (weekly/NET terms), cut-off days, and time zone.
- Align currency used in reports vs. payouts; note rounding rules.
- Keep a simple reconciliation sheet: approvals & earnings → payout line items.
Mini “How-to” - first 5 steps
Getting started with Leadgid doesn’t have to be complex - it just requires a clean, step-by-step setup to make sure every click, conversion, and approval is tracked accurately. These first five actions form your operational baseline, helping you connect tokens, verify postbacks, and build your first cohort report with full visibility into performance. Follow them once, and you’ll have a reliable, scalable structure ready for ongoing optimization and steady EPC growth.
- Map tokens and paste UTMs + cid into your links.
- Enable S2S postback and run a full test (click → conversion → report).
- Build one cohort report with EPC + Approval columns; pin it.
- Launch one offer & one angle for 7–14 days; no mixing.
- Review approval reasons weekly; edit eligibility/fees copy; retest.
Need help mapping tokens? Talk to a manager.
Troubleshooting matrix (symptom → fix)
Even the best setups can break - that’s why having a clear troubleshooting matrix is essential for quick recovery. Use this guide to match common performance or tracking issues with their most likely causes and immediate fixes, so your campaigns stay stable and data stays trustworthy.
|
Symptom |
Likely cause |
Quick fix |
|
Conversions missing |
Postback off or wrong param names |
Re-test S2S; check that cid passes through and is echoed back |
|
UTMs blank in reports |
Token typo or broken link builder |
Validate the final URL; fix case/spacing; re-publish links |
|
EPC = 0 but approvals exist |
Currency mismatch or event name mismatch |
Confirm payout field & currency; align event names |
|
Approval rate volatile |
Mixed cohorts or lender outages |
Split cohorts; check AM notes; pause until stable |
|
Sharp mobile drop-offs |
Form friction or asset weight |
Compress assets, fix tap targets and input masks |
Common mistakes (and quick fixes)
- Launching without a click ID. Add cid everywhere and retest.
- Mixing GEOs/sources/angles. Keep cohorts clean, or you can’t diagnose EPC.
- Ignoring approval notes. Set a weekly ritual to update eligibility/fees copy.
- No payout reconciliation. Align currencies and cut-offs; sanity-check EPC vs. earnings file.
- Untested postback. Never scale without a successful end-to-end test saved as evidence.
A strong start in affiliate marketing begins with clean policy checks, precise tracking, and approval-focused optimization. When your cohorts are clearly named, your postbacks tested, and your reports pinned, every metric in the Leadgid dashboard starts working for you - not against you.
Weekly wins = clean cohorts. Set up tracking & postbacks on Leadgid. We’ll help you pin the right reports and iterate - Join.
FAQ
- Map UTMs + a click ID, enable an S2S postback, and pin a cohort view (GEO/device/source/angle) with EPC and Approval columns.
- Add your S2S endpoint, pass cid in links, fire a test conversion from the network, and verify the log/report shows the right status and payout.
- It's utm_source, utm_medium, utm_campaign, utm_content, and a unique cid for stitching clicks to conversions.
- Yes, if available; use reporting endpoints or daily CSV exports to snapshot clicks, conversions, approvals, and payout by UTM fields.
- Copy denial/approval notes verbatim into your log, then update eligibility, fee/timeline copy, or device UX accordingly and re-measure.
- Cadence, cut-off day/time zone, currency/rounding, and how your earnings report maps to payout line items.